8/16/2010

Photoshop Dream Efek Kabut


[2] Press Ctrl+L to open level settings. Apply the following settings as shown.


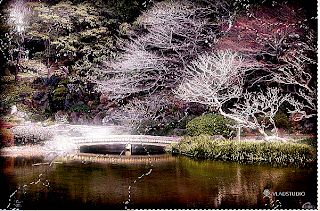
[3] Your image will be look like this.


[4] Now go to Filter>Distort>Diffuse Glow apply the following settings as shown.


[5] Your image will be look like this.

[6] Press Q to enable quick mask.


[7] Now go to Filter>Render>>Difference Clouds. Press Q again to disable quick mask.


8/15/2010

Create a Ying Yang Inspired Poster in Photoshop


Today we will create a poster inspired by the all-known symbol, Ying and Yang. We will try to create the same balance from the sign in a more elaborate illustration.
Difficulty: Intermediate
Completion time: 1-2 hours
Tools: Adobe Photoshop CS3
Resources:
Girl from Katanaz-Stock
Birds from Fairiegodmother
- Designious splashes brush pack 1
- Designious paint brush pack 1
Smoke brushes from Falln-Brushes

What you’ll be creating Read More

8/11/2010

TRANSFORM YOUR DOODLES INTO ART


Turn your idle sketches into gold with this amazing tutorial from Craig Shields.


Doodling is an everyday part of life for most creatives – it’s as natural as holding a pen. Whether you’re etching out little characters on the back of an envelope while you’re on the telephone, or creating a complex masterpiece in the back of a notebook, bus trip by bus trip, it’s an essential part of developing your own style and honing your imagination and artistic skills.
Many creatives, then, will have a bag full of doodle-filled notebooks, and a desk covered in messed-up envelopes and Post-It notes. But what do you do with them afterwards?
Much of the time they end up in the bin – we don’t see them as an important part of our creative work. This is a shame, as when you’re freed from commercial constraints and drawing for fun, your true style can shine through.
In this masterclass, Craig Shields shows you how to turn these little outbursts of creativity into artworks. You’ll learn how to spirit your doodles off the Post-It note and into a digital illustration, using them to add a very personal touch to an image. The masterclass makes use of several images that can be downloaded for a small fee or for free.
01. Find yourself a decent high-res stock image, or use an image of your own. For this illustration I’ve chosen a quirky futuristic image of a model, which you can download for a small cost from iStockphoto at this link:http://tinyurl.com/5j2jog. You can use any portrait that has a fairly clear background.

02. We’re going to insert some layers behind the figure later on, so we need to create a layer mask. First, select the Pen tool, and create a path around the edge of her face, hair and arms. Then right-click (Ctrl + click) your path, and pick Make Selection. Then go to Layer > Layer Mask > Reveal Selection to create your layer mask. Name this layer ‘Woman’. Read More


8/10/2010

Reconstruct a Face to Make it Macth Coustum Skull

In this tutorial, you will learn how to use layer masking along with the burn tool, brush tool, pen tool, and various others to recreate a face to match a skull.Next

Digital Painting Techniqeus


Concept art is used widely in cinematic, videogame and literature projects, to help convey a given message, situation or environment to the viewer.  Whether it’s a rough concept sketch, or a highly polished conceptual artwork, having a smart workflow and the right techniques can make a big difference.
In this tutorial, you’ll learn how to create spectacular science fiction concept art from one of the digital painting masters, Grzegorz Rutkowski.  You’ll learn how to start with a concept sketch, use some rules of composition and perspective, and then develop a progressively more detailed concept sketch with a powerful visual impact. Let’s get started!

Creative Styling For Your Car

Would you like to know how to make interesting styling and cool looking aerography for the car in Photoshop? If yes, then I can share with you some secret technologies how to do it.Read More